DIY Box Blind for Deer Hunting
For years I
have either hunted from the ground in a portable blind, from a treestand or
even from friends box blinds. This year I decided to do something different and
build my own box blind. I am a welder by trade and most of what I weld is small
and not in need of alot of fitting. Thus I do very little structural work. So I
needed help. I searched the internet for information reguarding building a box
blind and found out one thing......most want you to buy their diagrams. Now
don't get me wrong, there is nothing wrong with that. But I decided to attempt
building my own. I had bought the material over a course of a few weeks, a
little here and a little there. Trying to determine what I thought I might
need. But I will do my best to give you a list later on. The following is my
first attempt at building a 4x8 deer hunting box blind.
|
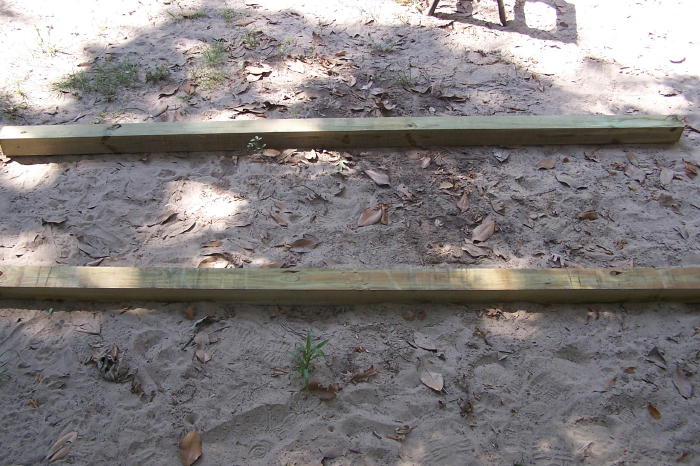
 First I had to decide if I wanted an
elevated blind or one close to the ground. Knowing where this blind was going
to be placed I opted for the close to the ground version. So my beginning point
was two 4x4 runners. Since I was making an 8 foot long blind I had to trim the
runners. Itrimmed them long enough to leave about 6 inches sticking out on each
end. First I had to decide if I wanted an
elevated blind or one close to the ground. Knowing where this blind was going
to be placed I opted for the close to the ground version. So my beginning point
was two 4x4 runners. Since I was making an 8 foot long blind I had to trim the
runners. Itrimmed them long enough to leave about 6 inches sticking out on each
end.
|
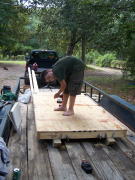
 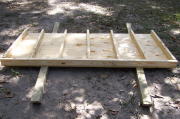 The next step was laying out the floor pan. I used a
full sheet of 4x8x3/4 inch plywood. On that I laid 2 8 foot 2x4's and fit 7
2x4's between them. I nailed the floor frame together but didn't add the
plywood yet. The next step was laying out the floor pan. I used a
full sheet of 4x8x3/4 inch plywood. On that I laid 2 8 foot 2x4's and fit 7
2x4's between them. I nailed the floor frame together but didn't add the
plywood yet.
|
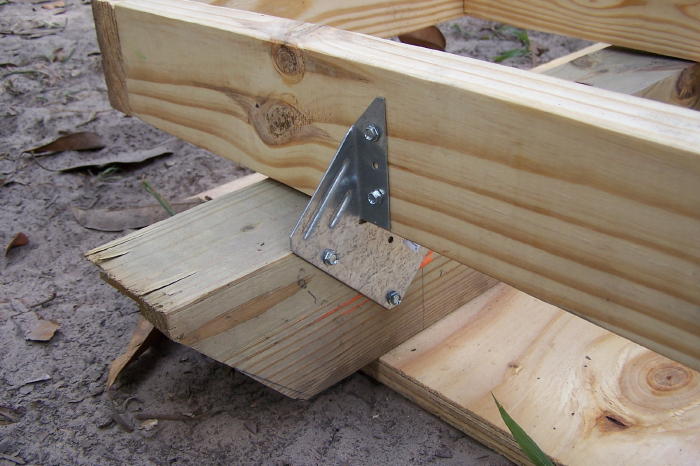
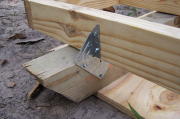 Prior to adding the plywood I
attached the floor pan to the runners. To do this I used Hurricane Rafter Ties.
I put these ties on all but two of the 2x4's. Each end got one on each side of
the runner while only one went on the inner boards. I did alternate them from
inside the runner to the outside of it however.
Prior to adding the plywood I
attached the floor pan to the runners. To do this I used Hurricane Rafter Ties.
I put these ties on all but two of the 2x4's. Each end got one on each side of
the runner while only one went on the inner boards. I did alternate them from
inside the runner to the outside of it however.
|
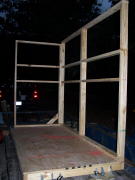
 The next step was attaching the
floor plate to the framework. As you can see, this is where child labor pays
off. Seriously though, my son was all over helping me out on this project.
Notice that we have placed the blind onto the trailer we would be transporting
it with. Simply use a chalk line and mark where to place screws.
The next step was attaching the
floor plate to the framework. As you can see, this is where child labor pays
off. Seriously though, my son was all over helping me out on this project.
Notice that we have placed the blind onto the trailer we would be transporting
it with. Simply use a chalk line and mark where to place screws.
|
|
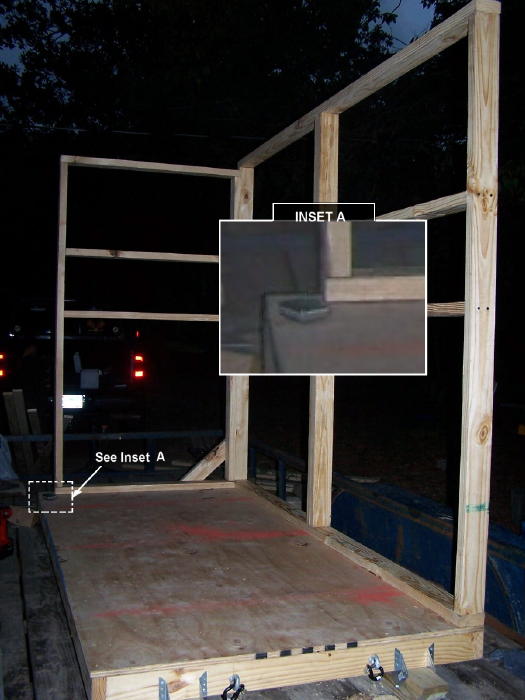
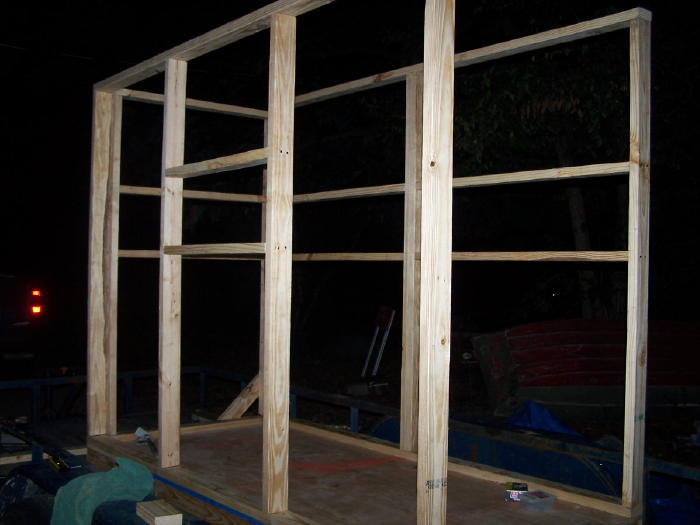
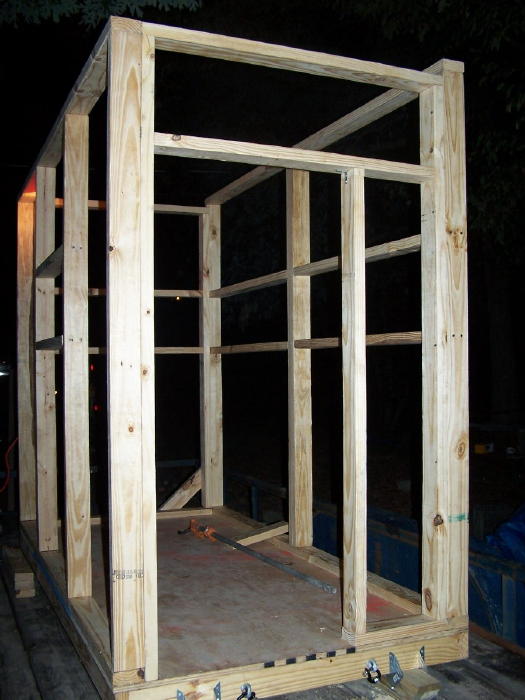
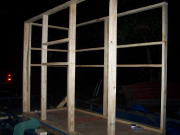
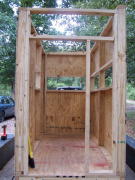
 This shows the front and one side wall added. First I
had to decide how wide to make viewing windows, what height to put them at and
if I was going to have side windows. The bottom of the shooting windows is
40" high. This works out well for kids and adults considering we use
adjustable chairs. Notice the side wall doesn't come all the way to the edge.
(click picture for inset) Only the front and back walls go the entire length.
Also notice that the front wall is slightly higher. This is going to allow me
to have a pitch to the roof. This shows the front and one side wall added. First I
had to decide how wide to make viewing windows, what height to put them at and
if I was going to have side windows. The bottom of the shooting windows is
40" high. This works out well for kids and adults considering we use
adjustable chairs. Notice the side wall doesn't come all the way to the edge.
(click picture for inset) Only the front and back walls go the entire length.
Also notice that the front wall is slightly higher. This is going to allow me
to have a pitch to the roof.
|
  I decided the back wall would have only one window.
This was determined by where I was placing the stand. Behind where I am placing
it is thick vines and cover so there is very little chance of having a
shot. I decided the back wall would have only one window.
This was determined by where I was placing the stand. Behind where I am placing
it is thick vines and cover so there is very little chance of having a
shot.
|
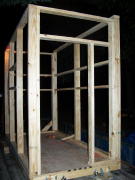 I decided to have the door on
the right side of the blind (looking out of the front) as this is the direction
I will be coming through the woods from. I will however be making some changes
to this doorway, such as adding a window, very soon.
I decided to have the door on
the right side of the blind (looking out of the front) as this is the direction
I will be coming through the woods from. I will however be making some changes
to this doorway, such as adding a window, very soon.
|
 I began skinning the blind out the
next morning. Using 3/8" plywood for this as I wasn't sure what I really
wanted. This picture might give you an idea of the depth of the stand. Once you
begin to skin it out, you will get a good idea of how rigid and sturdy the
blind becomes. I began skinning the blind out the
next morning. Using 3/8" plywood for this as I wasn't sure what I really
wanted. This picture might give you an idea of the depth of the stand. Once you
begin to skin it out, you will get a good idea of how rigid and sturdy the
blind becomes.
|
|
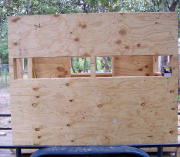 Skinning the front was fairly easy
with the lighter plywood. I placed it against the frame and ran a few screws
into it. Then I went to the inside and marked the window openings. I unscrewed
the plywood and cut the openings. This was done for all windows and doors. Not
long after I finished this piece, we strapped it down and drove it up to the
lease. Skinning the front was fairly easy
with the lighter plywood. I placed it against the frame and ran a few screws
into it. Then I went to the inside and marked the window openings. I unscrewed
the plywood and cut the openings. This was done for all windows and doors. Not
long after I finished this piece, we strapped it down and drove it up to the
lease.
|

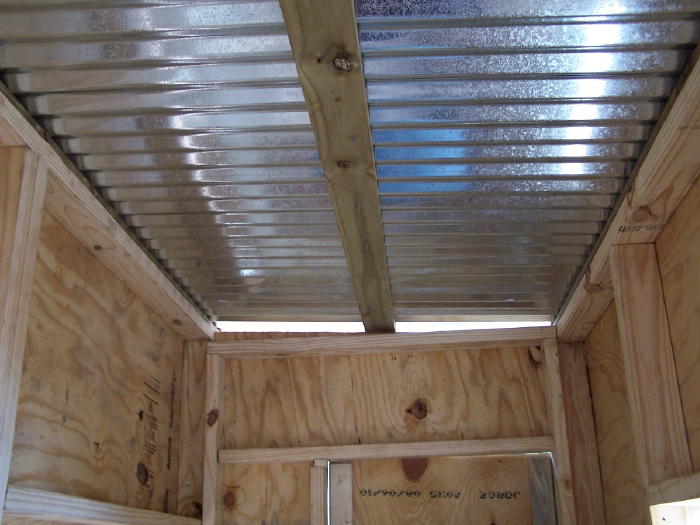
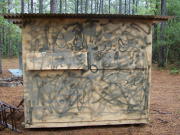 I added the roof once I got to
the lease. Using 3 treated 1x4's as the cross supports I added tin. Buying the
tin in 12 foot pieces and having the proper cutoff wheel for the circular saw
made this job easy. I simply cut them in 6 foot sections and it left me with a
foot of overhang on both sides.
I added the roof once I got to
the lease. Using 3 treated 1x4's as the cross supports I added tin. Buying the
tin in 12 foot pieces and having the proper cutoff wheel for the circular saw
made this job easy. I simply cut them in 6 foot sections and it left me with a
foot of overhang on both sides.
|
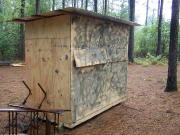 The door I added is just temporary right now. Once
done it will have extra support and a lock on it. As will the windows. As you
can see, I did in fact buy some paint for the stand and decided to let my kids
decorate it. Once it is put in place and the deer get used to it, color will
matter little. The door I added is just temporary right now. Once
done it will have extra support and a lock on it. As will the windows. As you
can see, I did in fact buy some paint for the stand and decided to let my kids
decorate it. Once it is put in place and the deer get used to it, color will
matter little.
|
 As you can see from the inside, there
are plenty of gaps to be filled. One thing I want to avoid is coming back next
year and having to argue with wasps over whose blind this is. As you can see from the inside, there
are plenty of gaps to be filled. One thing I want to avoid is coming back next
year and having to argue with wasps over whose blind this is.
|
For information sake, I built this blind in about 10
hours. Working on it until midnight on a Friday night and continuing on
Saturady. Naturally this is not the ideal way to make a blind. But this blind
is extremely sturdy and come winter, if it was like last years, it will keep my
kids warm and comfy. After they get completely hooked on hunting, then they get
kicked out in the cold and the ol' man can enjoy the comfort and satifaction of
building his blind.
Still not sure
if a box blind is right for you? Or perhaps you like moving around. Try using a
portable
pop up blind Easy to set up and easy
to transport are two of the best reasons to use one. I hunt out of one every
year as do my kids. And the best feature? Price. The box blind I made cost
around $300 dollars and time. You can step into a pop up for under a
hundred. Easy to set up and easy
to transport are two of the best reasons to use one. I hunt out of one every
year as do my kids. And the best feature? Price. The box blind I made cost
around $300 dollars and time. You can step into a pop up for under a
hundred.


|
Home | Hunter
Education | My Kids |
Product Review |Privacy Policy |Fishing and
Hunting Reports |Email
|
Copyright © 2005-2013 OutdoorTexan.com
|